Cornell University
School of Electrical and Computer Engineering
Diversity Programs in Engineering
CURIE Academy 2014
Design Project: Exploring an Internet of Things
Prof. Christopher Batten
237/239 Phillips Hall • July 13–19, 2014
home | details | schedule | lab1 | lab2 | lab3 | projects | handouts | photos | video | sponsors
In the third lab, scholars put hardware and software together to create a basic IoT system: a "smart door" that included an IoT device to send the door status to the cloud and a different IoT device to poll the cloud and display the door status using a small light. The IoT input and output devices were based on combining the Arduino micro-controller with a WiFi module. This lab served as a gentle introduction to IoT and as a starting point for the scholars' design projects. For detailed information about the lab see the following lab notes and handout. The lab notes review background information while the lab handout was used by CURIE scholars during the lab session.
Lab 3 Overview
Scholars were organized into groups of five to six for the design projects, and these same groups were used for the third lab session. Scholars started the lab session by dividing into two "sub-groups" with two to three scholars in each. One sub-group was responsible for the IoT input device, while the other sub-group was responsible for the IoT output device. For the IoT input device, scholars attached a momentary switch to one of the digital inputs of the first Arduino micro-controller and developed a program to upload the status of this switch to the IoT cloud. For the IoT output device, scholars wired up a LED with current limiting resistor to one of the digital outputs of a second Arduino micro-controller and developed a program to poll the IoT cloud to display the door status using the LED.
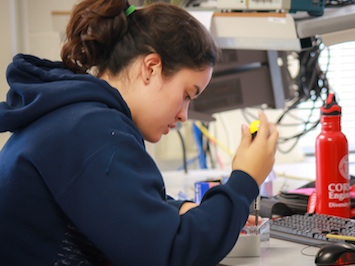
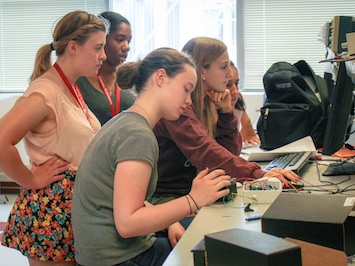
The following two photos show scholars working on the lab. The left photo shows a scholar working on assembling her IoT device enclosure. The right photo shows scholars working on programming their IoT devices.
|
|
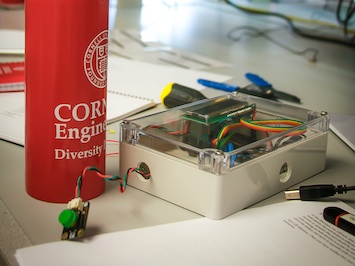
Lab 3 Hardware
To support the lab, we developed an IoT device platform using an Arduino micro-controller, Adafruit CC3000 break-out module, Adafruit I2C LCD character panel, half-sized breadboard, custom battery harness, and a rugged Polycase enclosure. This base platform was put together ahead of time and ready for scholars to use in the lab session by adding components to the breadboard and programming the Arduino micro-controller.
|

|
Lab 3 Software
We used the Xively IoT service as our IoT "cloud". We developed a custom library built on-top of the Texas Instruments CC3000 host-driver implementation and heavily inspired by the Adafruit CC3000 library. Our custom library was designed to enable scholars to upload/download data to/from Xively in a single line of code. The library handles starting the CC3000 WiFi module, connecting to a dedicated wireless access point, assembling HTTP PUT/GET requests for Xively, and parsing HTTP responses. Scholars were able to log into Xively to monitor their IoT devices and view detailed data logs. The following code illustrates a simple solution to Lab 3 for both the input IoT device and the output IoT device.
//------------------------------------------------------------------------
// "Smart Door" IoT Input Device
//------------------------------------------------------------------------

int door_status = 0;

void loop()
{
  // Read the door status

  int current_door_status = digitalRead( pin_button );

  // If door status has changed, then post updated status to cloud

  if ( current_door_status != door_status ) {

    // Update the LCD panel

    lcd.setCursor(0,0);
    lcd.print("Door Status: ");
    lcd.print(current_door_status);

    // Send new value to the cloud

    curie_cloud.send_int( "door_status", current_door_status );

    // Update the previous door status

    door_status = current_door_status;
  }

  // Wait until checking the door again

  delay(100);
}

//------------------------------------------------------------------------
// "Smart Door" IoT Output Device
//------------------------------------------------------------------------

void loop()
{
  // Read the door status from the cloud

  lcd.setCursor(0,1);
  lcd.print("checking cloud");

  int door_status = curie_cloud.recv_int( "door_status" );

  lcd.setCursor(0,1);
  lcd.print("              ");

  // Update the LCD panel

  lcd.setCursor(0,0);
  lcd.print("Door Status ");
  lcd.print(door_status);

  // Update the LED

  if ( door_status ) {
    digitalWrite( pin_led, HIGH );
  }
  else
    digitalWrite( pin_led, LOW  );

  // Wait until checking the door again

  delay(3000);
}